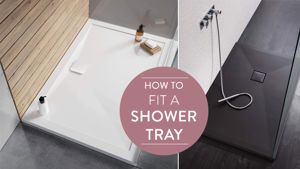
Fitting a shower tray is a slightly daunting task that, if you feel you might struggle with, should be done by a professional. If however, you have faith in your DIY skills or just fancy the challenge of fitting a shower tray yourself then please stay tuned, as our DIY gurus at Tap Warehouse are here to tell you everything you need to know (while encouraging you to call in a professional if you’re unsure).
Ready to become a master of shower tray installation? Here’s how.
How Important are Shower Trays?
Shower trays are a fairly vital piece of kit. They stop your home from flooding by catching all the water from the shower. So if you’re wondering whether you can get away with not having a shower tray in the first place, the answer is a firm ‘no’. A shower tray installed badly will be useless, which is why it’s important that this task is done right.
What Type of Shower Tray are you Installing?
There’s two different types of shower tray, a height adjustable shower tray, and a low profile tray. Height adjustable trays sit on legs underneath the shower tray itself. This raises the profile and allows you to easily access the pipes if necessary.
A low profile tray sits on the bathroom floor and has the look of a walk in shower. These have no gap underneath, making it a little harder to access the pipes, and a little harder to install. However, these are exceptionally stylish and modern - making the tricky installation all the more worth it!
Installing a Height Adjustable Shower Tray
Before you even start the shower tray installation, triple check the dimensions of your shower tray to ensure it fits in the space you want it.
You will need:
- A spirit level
- A dust sheet
- A drill
- A kettle/watering can
- A hacksaw
- Silicon sealant
- A sealant gun
This is the easier of the two shower trays to install, and requires little more a little confidence in your own DIY abilities (and if you don’t have this then just pretend).
Step 1
Place the tray roughly where you’d like it installed to double check it fits in this area. Screw the legs into position and adjust the height to where you want it, using a spirit level to ensure it’s flat. Loosely install the shower tray waste to check the space.
Step 2
If you’re happy with how it fits, take the side panels and line these up in the right place. Remember to read the instructions to double check the minimum and maximum heights for both the tray itself and the side panels. The side panels may need to be trimmed down using your hacksaw.
Step 3
Attach the underside of the waste to the waste outlet pipe. This needs to be done carefully to ensure there’s no gaps or loose pipework. Test this by pouring some water into the waste using a watering can or kettle! If there is any leakage then remove all your connections and start again.
Step 4
Get your spirit level again and triple check that the shower is flat and 100% level. Showers are designed to work when they are flat, and the attitude of ‘that’s flat enough’ won’t get you very far! A slight unevenness can have disastrous consequences.
Step 5
Once you’re happy with how everything fits, and the connections, it’s time to seal it. Using your silicone sealant, seal around the edges of the shower tray - starting first where the tray meets the walls of the bathroom. Leave to set for the instructed time, which might be up to 24 hours (but follow the instructions!).
Step 6
Once your shower tray is sealed you can tile the walls around the shower tray, leaving a 3mm gap between the tiles and the shower tray. Fill this gap with the sealant.
Installing a Low Profile Shower Tray
These can be slightly more complicated to install, but don’t let that put you off! (Although we must urge you yet again to hire a professional if you have any doubts).
You will need:
- A pencil
- Spirit level
- Jigsaw
- Dust sheet
- Bucket
- Building sand
- Cement
- Mortar trowel
- Jug/kettle
- Silicone sealant
- Sealant gun
Now you know what you need, let's get down to the nitty-gritty.
Step 1
Ensure the floor underneath the tray is capable of supporting the tray itself. It should be firm with no flexibility,
Low profile shower trays can be very heavy, and may damage weaker bathroom floors. Check that you can stand on the bathroom floor with no flex, and if not then you will need to replace the floorboards with thicker boards.
Use your spirit level to check the floor is 100% level.
Step 2
Cut an access hatch into the floorboards next the fitting area. Trace your lines with your pencil and use a jigsaw to be accurate. This will allow you to access the pipework when the low profile shower tray has been set.
It’s recommended to use a dust sheet across the shower tray to ensure it doesn’t get damaged.
Step 3
Assess the location of your shower tray waste and bathroom waste pipe, cutting a recess around these. Use your pencil to mark these areas and cut the recess, remembering that the fit should be comfortable and not overly tight.
Assemble the waste and lay it in place.
Step 4
Create mortar by mixing building sand with cement. Use 5 parts building sand to one part cement. Then use your trowel to lay a thin, even level of mortar across the spot, using steady strokes and ensuring there’s no bumps.
Step 5
Apply your low profile shower tray onto the mortar and press gently, using your spirit level to keep checking that it’s 100% level. If it’s not level, lifting the shower tray to reset is fine. Once you, and your spirit level, are happy that it’s level, leave it to dry for at least 24 hours - and congratulate yourself with a well deserved cup of tea!
Step 6
Unfortunately, the hard work isn’t over. Use your access hatch cut beside the shower tray to connect the waste and waste pipe. Check it’s secure by pouring water into the waste using your kettle or jug. If there’s any leakage then start again with your connections.
Step 7
Double check everything is securely connected and then it’s time to seal - which you’ll be glad to know is the final step.
Seal around the edge of the shower tray using your sealant, leaving a 3mm gap between the edge of the tiles and the shower tray. Leave the initial seals for 24 hours.
Step 8
Run a secondary line of sealant in the gap to ensure no leakages occur.
Finished!
Congratulations! You have successfully installed either a height adjustable shower tray or a low profile shower tray, and if done properly these should be completely level! Once you’ve left the sealant to set for 24 hours, your shower should be ready to use so hop in and enjoy knowing that you are now a shower tray installation master!
If you encounter any issues with your shower tray, please do not hesitate to get in touch with the team at Tap Warehouse. Providing you have followed the manufacturer’s instructions, and stuck to this guide, you should have no issues with your shower tray. However, we know that DIY doesn’t always run smoothly, so our team are here to help if you need us. Please just contact us.


